How to Ruck without knee pain

To Ruck without knee pain, you need three things: (1) a conservative starting dose, (2) clean walking mechanics, and (3) progression rules you don’t break. Start with 10–20 lb, 20–30 minutes, 2–3x/week, flat route, and keep your stride short and cadence steady. For the first month, progress one variable at a time: time → hills → weight. If knee pain shows up, don’t “push through.” Use the 24–48 hour rule: if it changes your gait during the Ruck or lingers/worsens after, back off immediately by cutting weight/time and removing hills until it’s calm again. Most knee pain from Rucking is a load-management problem, not a “toughness” problem.
First: the rule that saves knees
Your knees don’t care how motivated you are. They care how fast you ramp load.
Rucking is repetitive. Repetition + load + hills = awesome training… if you earn it.
So this whole article is going to be specific and actionable:
- exact starting weights
- exact week-by-week progressions
- exact form cues
- exactly what to do if pain shows up
The 5 causes of knee pain while Rucking

If your knee gets cranky, it’s almost always one (or a combo) of these:
- Too heavy too soon
- Too long too soon
- Too much downhill (downhill is sneaky brutal)
- Stride too long (big braking forces)
- Pack bounce (changes gait and load pattern)
Fix those five and most people Ruck pain-free.
The knee-safe setup

1) Start weight
Pick one starting weight and stay there for 2 weeks.
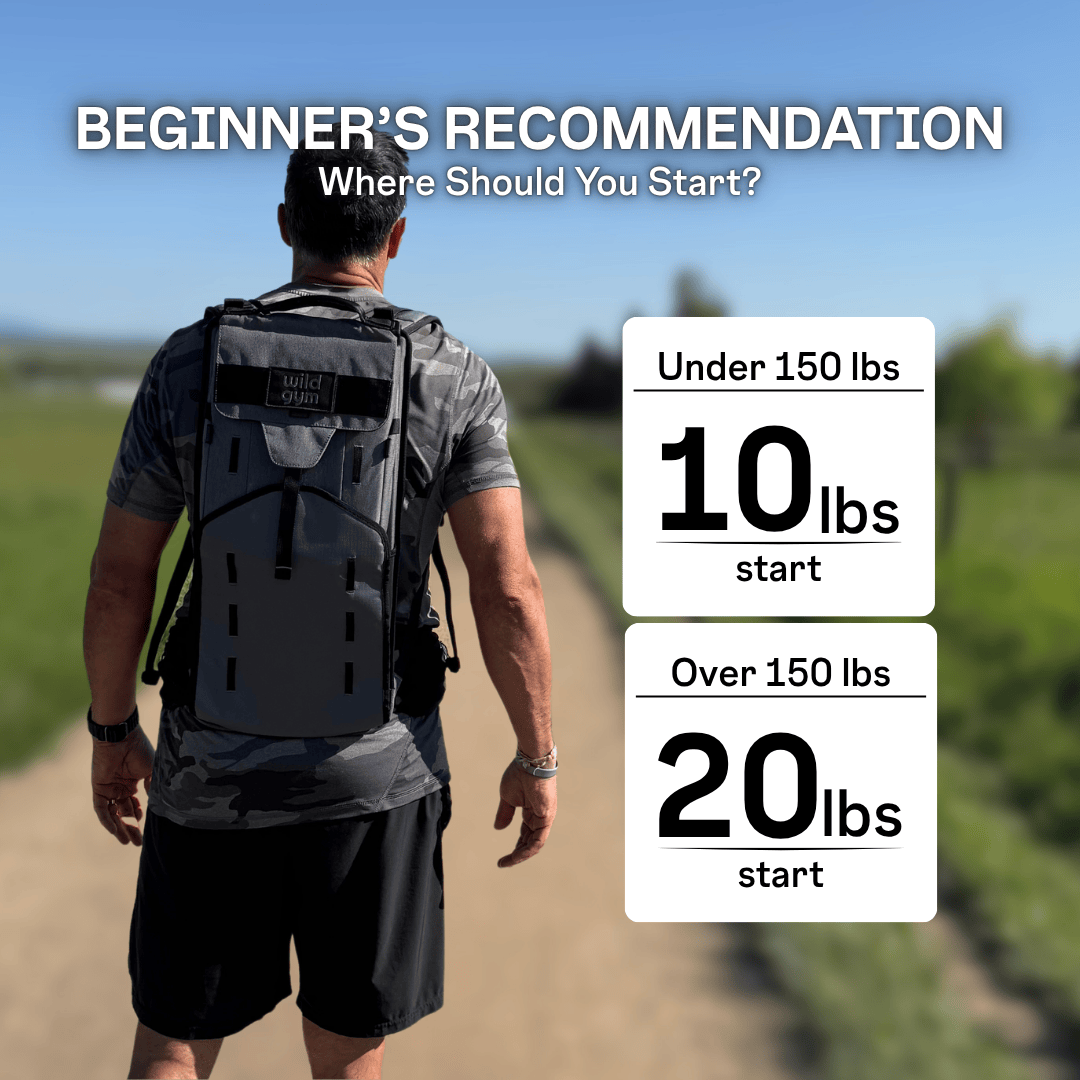
- Sensitive knees / new to training: 10 lb
- Most beginners: 15–20 lb
- Already walk/hike regularly: 20 lb (but keep sessions short first)
2) Session length
- Week 1–2: 20–30 minutes
- Keep it easy enough that you could do it again in 48 hours.
3) Frequency
- 2–3 Rucks/week, with at least a day between at first.
4) Route selection
For the first 2 weeks:
- flat route only
- avoid long downhills and long stairs
If you live somewhere hilly, do out-and-back so you don’t accidentally create a 20-minute downhill descent home.
5) Pack stability
If your load bounces, your knee is going to take weird stress.
Non-negotiable: weight is tight and high in the pack.
If you don’t have a plate pocket yet, wrap the weight in a towel and wedge it so it can’t move.
The “walk mechanics” that protect knees

These are the cues I want you to use every Ruck, especially if knees are sensitive:
Cue 1: Shorten your stride
If your foot is landing way out in front of you, you’re braking every step.
Directive: shorten stride 10–20% immediately.
Cue 2: Increase cadence slightly
You don’t need to measure it perfectly.
Directive: “a little quicker feet, a little shorter steps.”
Cue 3: Quiet feet
If you can hear yourself stomping, you’re loading aggressively.
Directive: aim for “quiet, smooth steps.”
Cue 4: Tall posture
Chest proud. Ribs stacked over hips. Don’t fold forward.
Directive: imagine a string pulling the crown of your head up.
The progression rules
This is where most people mess up.
Rule 1: Only change ONE variable per week
There are 3 dials:
- time
- hills
- weight
You may only turn one dial per week.
If you break this rule, your knees will vote “no” eventually.
Rule 2: Time before weight
For the first 2–4 weeks:
- increase time first
- keep weight steady
Rule 3: Hills before heavier weight
If you want more intensity, use gentle incline before jumping from 20 → 30.
The 4-week knee-friendly Ruck plan

This is the exact plan I’d give someone who says: “Dan, I want to Ruck, but my knees get cranky.”
Week 1
- 2 Rucks
- 10–20 lb
- 20–25 min
- flat route
- easy pace
Week 2
- 3 Rucks
- same weight
- 20–30 min
- flat route
- easy pace
Week 3
- 3 Rucks
- same weight
- 25–35 min
- flat route
- easy pace
Week 4
- 3 Rucks
- same weight
- 30–45 min
- 1 Ruck can include gentle rolling terrain (not a long downhill)
Then (only if knees feel great):
- add 5 lb OR add a bit more hill next week (pick one)
The “pain rules” (exactly what to do)
This is the part people need.
Stop the Ruck immediately if:
- pain makes you limp
- pain changes your stride
- pain is sharp, catching, or unstable
If pain shows up but doesn’t force a limp:
Use the 2-step downgrade right away:
Step 1 — remove the biggest knee stressor:
- If there were hills → go flat next time
- If the Ruck was long → cut duration by 30–50% next time
- If the weight was heavy → drop 5–10 lb next time
Step 2 — hold that lower dose for 1–2 weeks
Do not progress until you have:
- pain-free Rucks
- normal gait
- normal recovery the next day
The 24–48 hour rule
After a Ruck, your knee should feel:
- the same
- or slightly “worked” but improving
If it’s worse the next day or two days later, you did too much.
Directive: downgrade volume/weight until 24–48 hour recovery is clean.
Downhill: the sneaky knee killer

If you want pain-free knees, treat downhill like spicy food.
A little is fine. A lot will wreck you.
Beginner directive:
-
avoid long downhill descents for the first month
If you must go downhill:
- shorten stride
- keep cadence up
- stay tall
- slow down
- do not “brake” with the front of your knee
The 5-minute warm-up that helps immediately
Do this before Rucking if knees are sensitive:
- 10 bodyweight squats (slow, controlled)
- 10 reverse lunges each leg (short range is fine)
- 20 calf raises
- 30–60 seconds brisk walk to get warm
The 10-minute strength plan that keeps knees happy
If you want the best knee insurance policy, do this 2x/week (on non-Ruck days or after an easy Ruck):
- Step-downs (from a low step): 2 sets x 6–10 each leg
- Glute bridge: 2 sets x 10–20
- Calf raises: 2 sets x 15–25
- Wall sit: 1–2 holds of 20–60 seconds
NEW: Mobility to reduce knee pain (and improve range of motion)
Here’s the truth: a lot of “knee pain” is really knee overload caused by stiff ankles and tight hips.
When your ankle doesn’t flex well (limited dorsiflexion), your knee and foot have to compensate.
When your hips are tight or your glutes aren’t firing, your knee becomes the “motion” joint instead of a stable hinge.
So if your knees are cranky, mobility isn’t a fluffy add-on—it’s part of the fix.
The mobility priorities (in order)
- Ankles (dorsiflexion)
- Calves (they often limit the ankle)
- Hip flexors + quads (especially if you sit a lot)
- Glutes/hips (external rotation control)
6-minute “Knee-Friendly Mobility Reset” (do this after every Ruck)
Set a timer. Move slowly. Don’t force range.
- Knee-to-wall ankle rocks – 60 sec per side
- Foot stays flat, knee travels forward over toes.
- Keep heel down. Gentle pulses.
- Calf stretch (straight-knee) – 45 sec per side
- Targets gastric.
- Calf stretch (bent-knee) – 45 sec per side
- Targets soleus (this one matters for walking tolerance).
- Hip flexor stretch – 60 sec per side
- Squeeze glute on the back leg. Rib cage stacked (don’t arch).
- 90/90 hip switches – 60 sec total
- Controlled side-to-side rotations. No pain. Smooth reps.
That’s it. Six minutes. Your knees will notice.
NEW: Simple exercise template to reduce knee pain and improve ROM
This is a 3-day-per-week template that covers:
- range of motion
- tendon/quad tolerance
- hip stability
- ankle capacity
It’s not “rehab theater.” It’s just the minimum effective dose.
The template (3x/week, 12–15 minutes)
Do in this order. No equipment needed besides a step/chair.
A) Range of Motion (4 minutes)
- Knee-to-wall ankle rocks — 1 min/side
- Bodyweight squat to a box — 2 sets x 8–10
- Sit back to a bench/chair if needed. Controlled tempo.
B) Strength + Tendon Capacity (6–8 minutes)
3) Spanish squat hold or Wall sit — 2 rounds x 20–45 sec
- Spanish squat if you have a strap/band; wall sit if you don’t.
- Step-downs (low step) — 2 sets x 6–10/side
- Slow lowering. Light touch. Stand back up.
C) Hip + Calf Support (3–4 minutes)
5) Glute bridge — 2 sets x 12–20
6) Calf raises — 2 sets x 12–25 (pause at the top)
How to progress (so it actually works)
- Week 1–2: stay conservative, focus on control
- Week 3+: add 5–10 seconds to holds or 2 reps per set
- If you get soreness: fine
- If pain ramps or lingers 48 hours: reduce volume by 30–50% and rebuild
When to do it relative to Rucking
- Best: non-Ruck days
- Also good: after an easy Ruck (not after your longest/hilliest session)
Troubleshooting: “Where does it hurt?”
Use this quick map.
Front of knee / around kneecap
Most common causes:
- too much downhill
- too long stride
- too much load too soon
Directive: go flat, shorten stride, drop weight, cut time 30%.
Outside of knee
Common causes:
-
stride mechanics / hip weakness / too much hill volume
Directive: remove hills for 2 weeks + add glute bridges + step-downs.
Inside of knee
Common causes:
- the same “too much too soon” pattern
- or old injury sensitivity
Directive: reduce dose and keep it consistent for 2 weeks.
If you’re getting swelling, locking, giving-way, or sharp pain—get evaluated.
FAQ
Use this text to share information about your product or shipping policies.
Is rucking bad for your knees?
Rucking isn’t inherently bad for knees. The problem is usually dose (too heavy/too long/too hilly too soon) or sloppy mechanics.
What’s the safest beginner weight if my knees are sensitive?
10 lb. Do not rush. Build time first.
Should I add weight or distance first?
Distance/time first. Your tissues adapt slower than your cardio.
Are hills or weight worse for knees?
For most beginners, downhill hills are the biggest knee irritant. Weight is manageable if you stay flat early.
What’s the #1 form fix for knee pain?
Shorten stride and keep steps smooth.
How much mobility do I need?
Start with the 6-minute mobility reset after rucks. If you do nothing else, do that.
What exercise helps knee pain the fastest?
Usually an isometric hold like a wall sit (or Spanish squat) + step-downs, done consistently 2–3x/week.
When should I increase weight?
After you’ve had 2 weeks of pain-free rucking at your current weight and duration.
If I get pain, should I rest completely?
Usually you don’t need total rest. You need a dose downgrade (less weight, less time, flatter route) plus mobility.
Do I need a weighted vest instead?
A vest doesn’t automatically solve knee pain. Progression and mechanics solve knee pain.
Featured collection